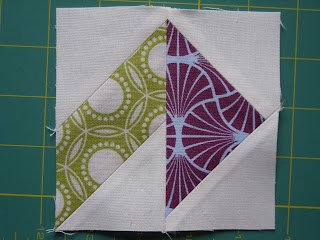
This block ends up as a 10 1/2" unfinished block. All seam allowances are a scant 1/4" unless otherwise indicated. As for all the blocks I have pressed open throughout the block, but if you prefer to press to the side it will work perfectly as well :o)
Like several of the other blocks I've written tutorials for, this one could be made using HSTs for the corner units - I like the continuity of the fabric pattern that you get when constructing it using my method, but if you wanted to use HSTs instead (which would waste less fabric) you'd need them to be 2.5".
Cutting Instructions:
This block uses four different print fabrics (noted as A, B, C and D).
Background fabric: Cut 17 squares, measuring 2.5" x 2.5"
Print fabrics:
Fabric A: Four 2.5" x 4.5" rectangles.
Fabric B: Four 2.5" x 4.5" rectangles
Fabric C: Two 2.5" x 4.5" rectangles
Fabric D: Two 2.5" x 4.5" rectangles.
Making the corner units:
The four corner units in this block are made using a flying geese unit, and a diagonal unit (the same as those we made for the pieced star centre pinwheels).
Remove ONE of your background squares and set it aside. For the remaining 16 squares, draw a diagonal line through the centre:
Take your four Fabric B rectangles, and set them out vertically. Place a background square at the top of each piece, aligning the top and sides, making sure the drawn lines are at the same angle.
Sew along the drawn line:
Trim 1/4" away from your stitching, and press your seam.
Take a second background square and align it with the other end of the rectangle, making sure the diagonal is at the same angle as the one you just sewed.
Sew along this line, trim 1/4" away and press. You will end up with four identical units like this:
Next, take your Fabric C and D rectangles (four total) and place a background square on each, again aligning the sides and end. Sew along this line, trim 1/4" away and press.
Take your remaining background squares, and place them on the opposite side, but this time the drawn line should cross the first sewn line - to make a flying geese unit.
Sew along this line, trim 1/4" away and press. You'll end up with FOUR of these units, two in each of Fabric C and D.
To finish the corner units, pair one of your flying geese with one of the diagonal units as shown (it's important to keep the orientation the same in each.)
Sew these together and press:
You will end up with four of these corner units. The corner units should measure 4.5" square.
Putting the Block Together:
Lay out all the fabric for your block as below. I've separated the rows in this photo, so you can see how the rows go together.Sew each of the rows, and then sew the rows together.
And you'll have a lovely Jack in the Box block!
There are two of these in the Twin sized quilt (and I haven't made my second one yet - see, I'm already in danger of falling behind in my own QAL...)
As ever, if you have any questions or problems, please just shoot me an email or leave a comment and I'll get back to you. Please add your blocks to the Flickr group :o)
Have a brilliant weekend!
xx Jess


9 comments:
that's a lovely block!
Beautiful. Im catching up....only one and a bit blocks behind now. I need for everyone not to need me for a whole day, so I can sit down and 'just do it' I will post to flicker soon....maybe this weekend.
I`m behind and hope to catch up soon.Thanks you for the tutorial!!
A fun block! =D
Lovely!
Great looking block, I love it!
Awesome!! Just made them and they came together so well. Great tutorial, thanks Jess!
yeezy
jordan shoes
adidas yeezy
golden goose
irving shoes
kyrie irving shoes
kobe
stone island
lebron shoes
lebron james shoes
basics dolabuy gucci Click Here Fendi Dolabuy check aaa replica bags
Post a Comment