Showing posts with label HFWYG QAL. Show all posts

Friday, 11 January 2013

{QAL} Linky Party Begins!!

It's time to link up your finished quilts and quilty items you've made using tutorials from our How Far Will You Go? QAL!

A massive, massive thankyou to our generous sponsor The Fat Quarter Shop for supplying the fabulous prizes.

There are three categories here, so please make sure you add your link to the correct one. You can link to either a blog post, or a flickr photo. If you don't have either of these, send me a quick email and I'll see if I can sort something out for you :o)

FULL TWIN SIZE QUILT CATEGORY
This category is for those of you who made all the blocks. Your quilt should measure about 50" x 75" or bigger.

There will be three prizes here - TWO $50 Gift Certificates and ONE $25 Gift Certificate.


THROW QUILT CATEGORY
This category is for those of you who made a smaller quilt - perhaps 40" x 50" or something similar.

There will be two prizes here - ONE $50 Gift Certificate and ONE $25 Gift Certificate


SMALL QUITED ITEMS CATEGORY (Pillows/cushions, mini quilts etc)

There will be TWO $25 Gift Certificates here.


QUILT TOP CATEGORY - we have decided to include a link up for those of you who have completed your quilt tops, but haven't quilted and bound them. We'll be giving a mystery prize from both our stashes to one winner :o)


Thanks so much to everyone who has joined us in our QAL, we have had such a great time doing it!

xx Jess

Friday, 4 January 2013

{QAL} Binding your quilt

Wow, this is the final post in the QAL - next week (the 11th January) link ups will open for all of you who have been quilting along. I'm thinking we'll leave the linky open for a week, so you'll have until the 18th to link up. The prize winners will be randomly drawn from all the entries, and I'll use Random.org to pick the winners!

 I'd like to say a massive thank you to all of you for joining us on this quilty journey, it's been a pleasure seeing so many different interpretations of all the blocks.

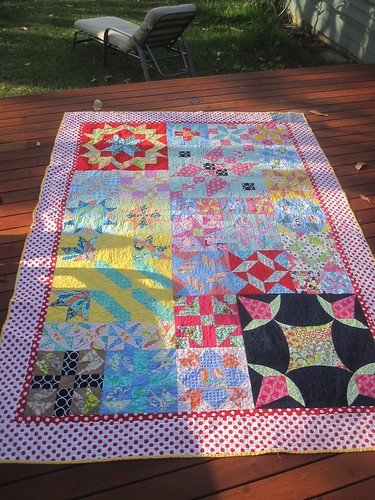
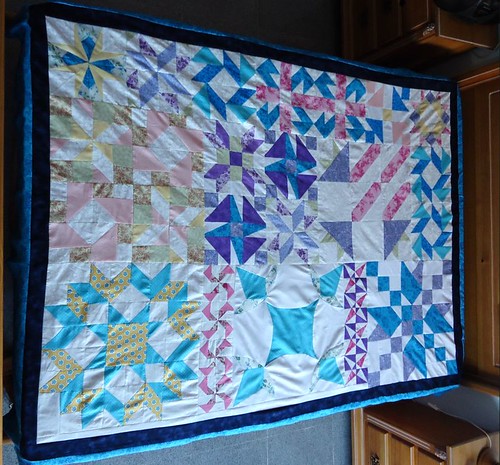
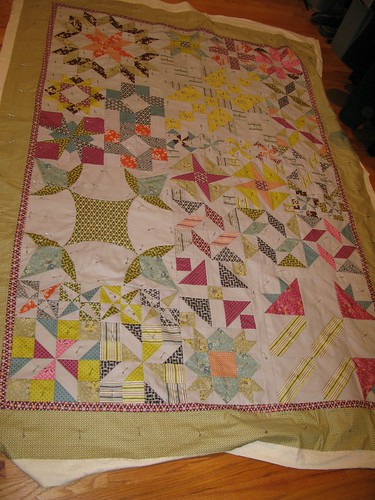
So before I get onto the binding info, I'd like to share some of the finished quilt tops (permission was given from everyone for me to share these). 

Nessa's Quilt
How Far Will You Go QAL - Finished
Image source http://www.flickr.com/photos/64598582@N08/8301870730/

Carine's Quilt
HFWYG 2012
Image source http://www.flickr.com/photos/83555958@N02/8303105273/


Rosa's Quilt:


DSC01938-890

Image source http://www.flickr.com/photos/67798274@N03/8279514858/

Sharon's quilt:

Completed Top

Image source http://www.flickr.com/photos/53634609@N05/8259296821/

Ella's Quilt:

HFWYG

Image source http://www.flickr.com/photos/28665243@N08/8239149699/

Right! So binding your quilt.

You will need 1/2 yard of fabric to bind the Twin sized quilt. If you're making a smaller version, my binding tutorial tells you how to work out how many strips you need to cut. Please just send me an email if you have any questions.

I wrote my binding tutorial a while ago (which I just updated tonight) but this is still how I bind quilts. There are loads of variations on how to do it though, my way is definitely not the only (or probably best) way - but it works for me :o)

Have a great weekend - we're in the middle of a crazy heat wave (40 degrees celcius today which is just not normal for our neck of the woods...) so we'll probably hide inside ;o)

xx Jess

Sunday, 25 November 2012

{QAL} Block 18 and Schedule Update

Jess put up the final block tutorial in the How Far Will You Go QAL on Friday.


Head on over to Scrappy n Happy for all the details!

We've allowed two weeks for everyone (including me :oP) to catch up on all the blocks - so we'll be back on the 7th of December with some tips on putting the quilt top together.

The schedule for the remainder of the QAL is below - so we've got a fairly long time to get them finished up for the link up (although with all the end of year shenanigans in amongst it, I'm betting it will fly by!).

Week 20 - 7th December: Piecing your quilt top together.
Week 21 - 14th December: Ideas for quilting (with two weeks given for finishing the quilting)
Week 24 - 4th January: Binding your quilt
Week 24 - 11th January: Link up your finished quilt.
Week 25 - 18th January: Prize winners announced.


Don't forget, if you've made anything using any of our block tutorials you can enter them in the small quilted items category. Jess has put together some gorgeous layout ideas for smaller lap sized quilt tops - so if you've only made a few blocks and still want to enter to win some Fat Quarter Shop gift vouchers that's an option too :o)

xx Jess

Friday, 16 November 2012

{QAL} Block 17 - Arrowheads

Welcome to the tutorial for Block 17 in the HFWYG QAL. This is my last tutorial in the How Far Will You Go? QAL (so it's the second-last block). I apologise, but this one is actually different from what we planned. The block we'd originally intended to be here is actually a 9-patch and the measurements we'd be using would have been horrific. So I've swapped it for a 64-patch block - apologies for anyone who desperately wanted to make a Rolling Pinwheel. I'm more than happy to write up a tutorial for it if anyone wants, but it would have to be an 18" block...

Anyhoo, the block we'll be making this week is called Arrowheads. It's the final 20" block in the QAL and you'll only need one if you're making the full size quilt. 

We'll be using techniques we've already covered in the QAL so it should be a pretty straightforward block to make. All seams are a scant 1/4" unless otherwise noted, and I have pressed my seams open throughout (but use your preferred method.)


Cutting Instructions:

I have split the cutting instructions down to Background, Colour 1 and Colour 2 - I actually used several different fabrics for Colour 1 and Colour 2, but that's up to you. 


Background fabric: 

* One 7.5" square
* Eight 3" x 5.5" rectangles
* Sixteen 3" squares.


Colour 1 - Main colour (blue)

* Two 6.5" squares
* Eight 3" squares
* Four 3" x 5.5" rectangles

Colour 2 - contrast

* Eight 3" squares
* One 7.5" square


Making the Centre 4-Patch:

Take four 3" squares (two of each colour) and sew them into a four patch. This should measure 5.5" square.


Making the Corner Units:

We'll be making four of these corner units - two in each of the two colours.

Start by laying out your unit pieces as below (3" print squares and 3" background squares, 3"x 5.5" background rectangles):


Sew the pieces into rows, and sew the rows together. You'll end up with four units (each measuring 8" squares) like this:


Making the Flying Geese Units:

Draw a line diagonally through the centre of the eight remaining 3" background squares.
Take  your four Colour 1 rectangles, and place a background square right sides together, aligning the top and sides.

Sew along this line, trim 1/4" away and press:


Take a second 3" background square and place it as shown.


Sew along this line, trim 1/4" away and press.


You'll end up with four flying geese units, each measuring 3" x 5.5".

Making the Quarter Square Triangles:

Take your background 7.5" square and draw a line diagonally through the centre. Place the square right sides together with the Colour 2 7.5" square. 


Sew 1/4" on either side of the drawn line, cut along your drawn line and press your HSTs.


Take your two Colour 1 6.5" squares, and draw a line diagonally through the centre on the wrong side.

Place these right sides together with the HSTs you just made - making sure your drawn line runs perpendicular to the line on the HSTs.


Again, sew 1/4" away from either side of this line, cut down the centre.


Press your units. You'll end up with two each of these quarter square triangle units:


Now you need to be a little careful that everything lines up when you trim these down. We'll be trimming them to 5.5" square - so the centre point is at 2.75". You can see in the photo below, I've line up the 45 degree line with the orange/background seam, and I've line up the centre point with the 2.75" point on my ruler. I trimmed the side and top at this point.


My ruler shifted slightly for this photo sorry - but you can see I've lined up the 5.5" marks as I normally would when trimming, but also made sure that 2.75" mark is at the centre of the unit.


Next, take your four flying geese and the four units you just made, and pair them up as shown below. Sew this seam and press.


Putting the Block Together:

Now all the sections are made, it's simply a matter of sewing them together as you would a 9-patch. Lay them out as below, and then sew into rows and sew the rows together.


Your finished block should measure 20.5" (so 20" finished).


As always please add your blocks to the flickr group - we have some seriously amazing quilts being made.

Have a fabulous weekend!

xx Jess

Friday, 9 November 2012

{QAL} Block 16 - Wandering Foot

Jess has put up this week's tutorial for the How Far Will You Go? QAL. It's a 20" block called Wandering Foot.


Those curves are a wee bit scary - but I'm looking forward to trying this one! Head over to Scrappy n Happy and check it out :o)

Have a brilliant weekend,

xx Jess

Friday, 2 November 2012

{QAL} Block 15 - Pinwheel Skew

This is my second-last tutorial in the QAL - I can't believe we've been going for 15 weeks! 

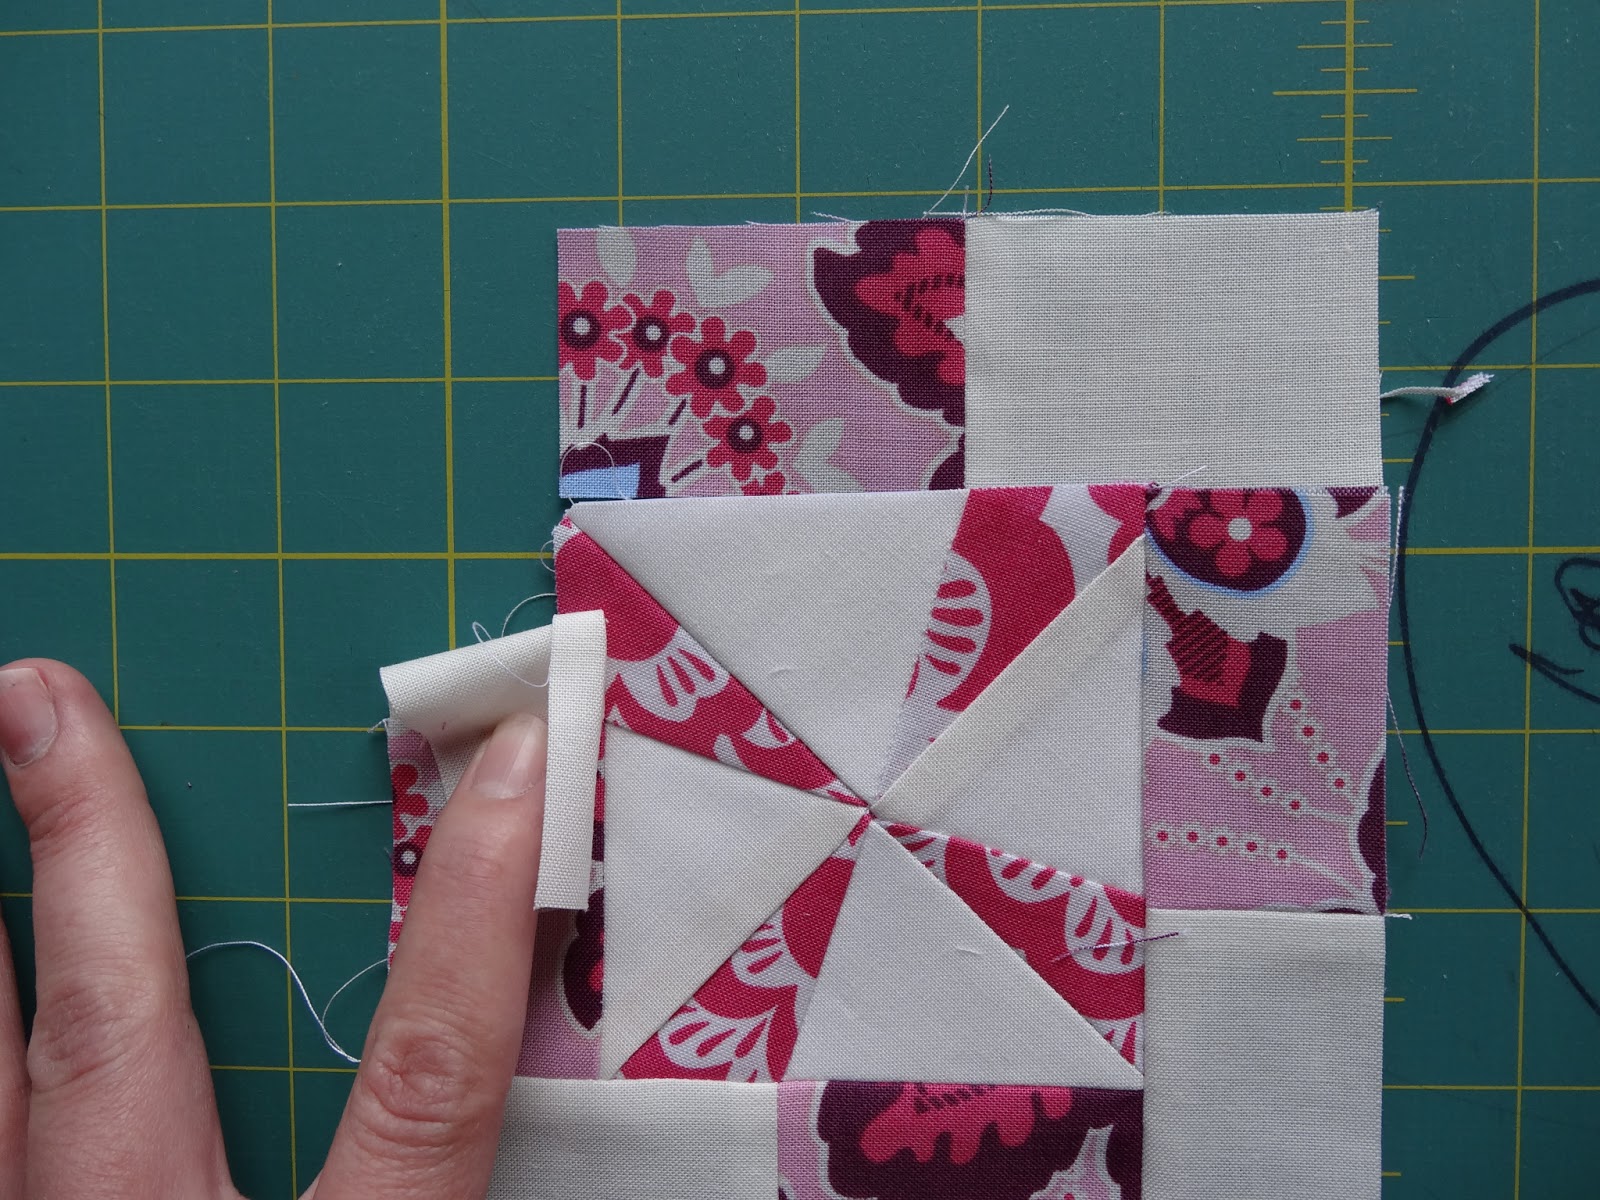
Block 15 is called Pinwheel Skew - and it's a 5.5" (unfinished) block. We'll be tackling a technique we haven't done yet - partial seams.


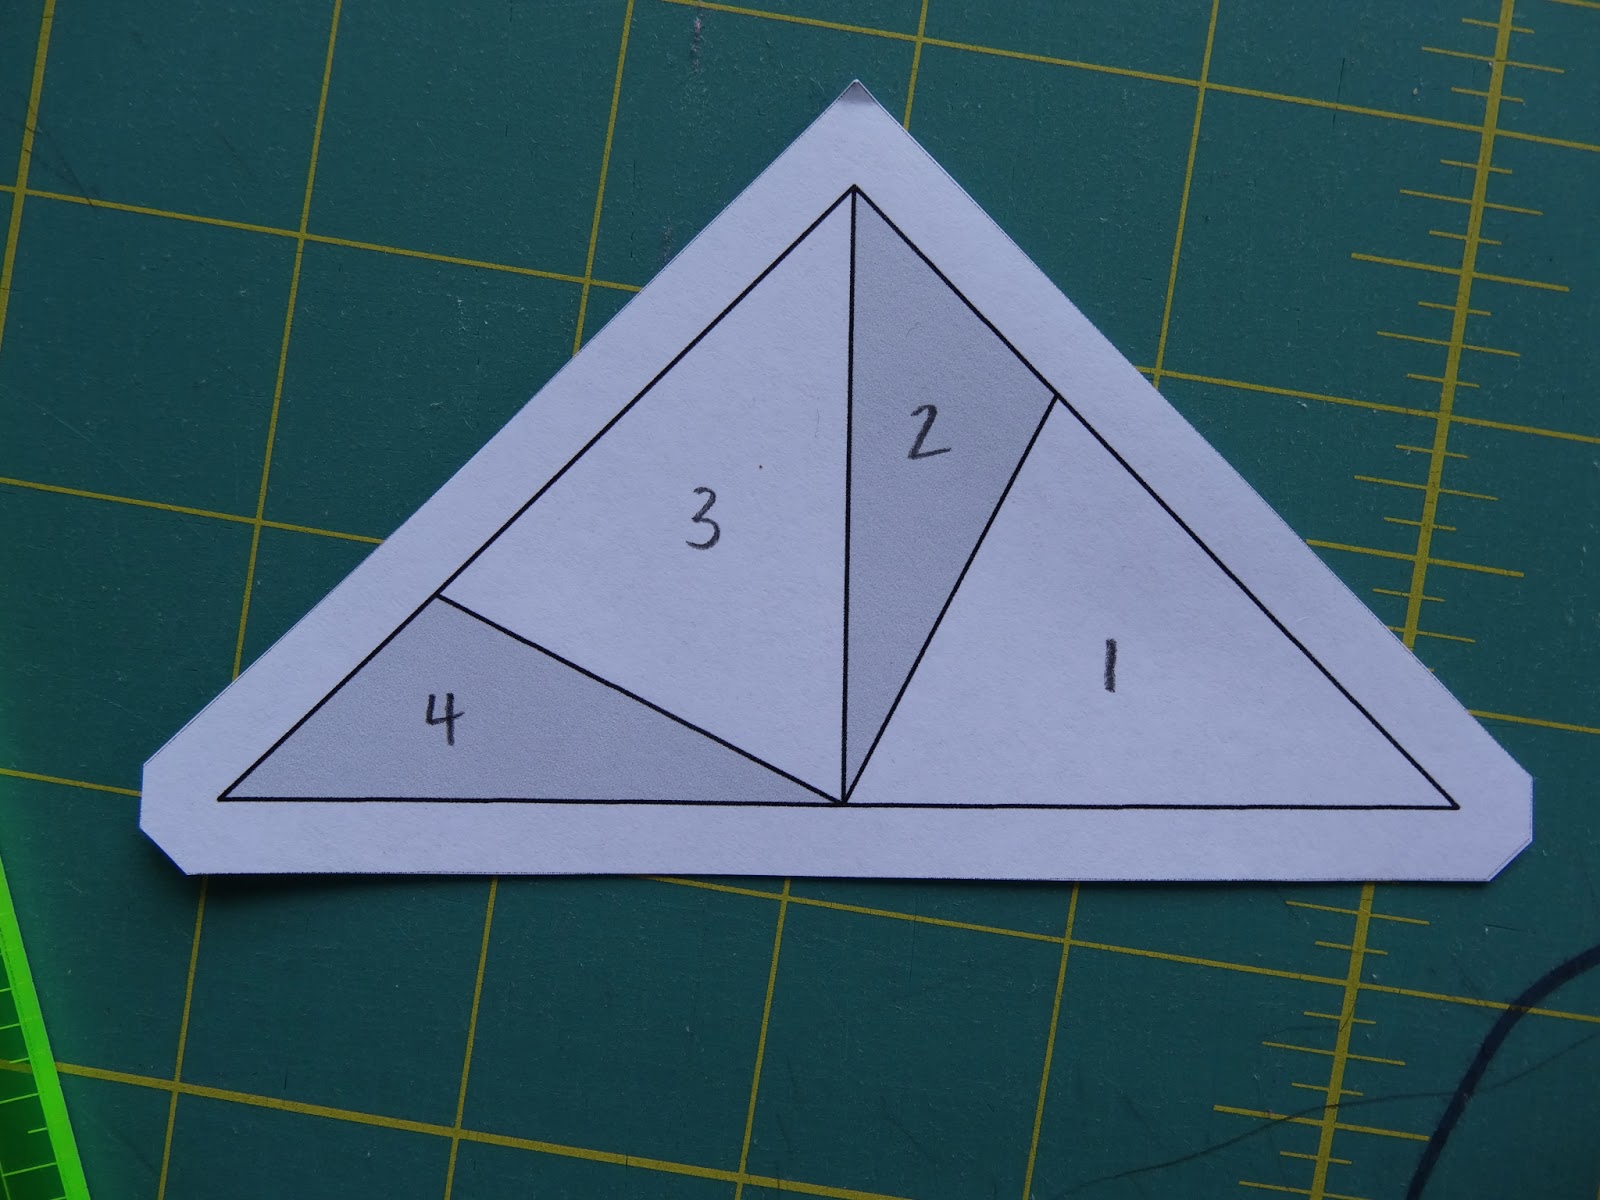
The centre part of this block is paper pieced - head over and download the template. Remember to print with NO page scaling :o)


Cutting:

You will need background fabric and two different print fabrics for this block. 


Print 1 (the centre pinwheel):

* Four 3" x 1.5" rectangles.

Print 2:

* Four 1.5" x 2.5" rectangles

Background Fabric:


* Four 1.5" x 2.5" rectangles.
* Two 4" x 4" squares - cut each of these diagonally through the centre.


Making the Central Pinwheel:

Print out your template - it won't have numbers on it so if you'd like to, write them on :o) You'll be making two identical halves for the pinwheel.

Take one of your background triangles, and place it on the wrong side of the template.

Remember to reduce your stitch length (I reduce mine to 1.5mm), and I like to do a couple of backstitches at the start and end of each seam.


Then take one of your Print 1 rectangles, and place it as shown behind the template (right side toward the paper).

Sew along the line between 1 and 2,  fold back the paper and trim 1/4" away. Press the print fabric over.


Take another background triangle, and place it as shown - it should sit square behind the template.


Again, sew along the line, fold the paper back and trim 1/4" away.


Press the background fabric over. Take another Print 1 rectangle, and place it as shown.


 Again, sew along the line, fold the paper back, trim and press your fabric over.

Next, trim down the two halves of the pinwheel, using the paper as a guide.
Take the two halves, and sew down the centre seam - I leave my paper in and follow the line, but you could remove the paper first if you prefer.


Press your seam (I pressed open) and the pinwheel is complete! It should measure 3.5" square (mine is square, it just doesn't look it ;o) )


Making the Borders

Take all eight of the 1.5" x 2.5" rectangles (four background, four print), and sew them end-to-end into pairs like so:


Press your seam open.


Line up one of your border sections, so the print part is aligned with a background section of the pinwheel, and a tail of background fabric hangs off the end.


Sew PART WAY along this seam, starting at the print end and stopping about 3/4" -1" before the end (I probably could have left myself more room here). Backstitch a few stitches to secure the end of the seam.


I pressed the print end of this piece open.


Next, take another border strip and place it as shown (mine was actually the right length - I have no idea why it looks so short in this photo!!)


Sew along the whole seam and press open. Continue around the edge with each of your border pieces.

When you get to the final piece, sew along the whole seam, making sure to tuck the end of the first strip out of the way. Press the seam open.


Now you can finish sewing the end part of that first strip :o)


Press that final section of your seam, remove papers (if you haven't already) and you have a finished 5.5" Pinwheel Skew!


There are two of these blocks in the full twin quilt. As ever, please add your finished blocks to the flickr group :o)

xx Jess

Saturday, 27 October 2012

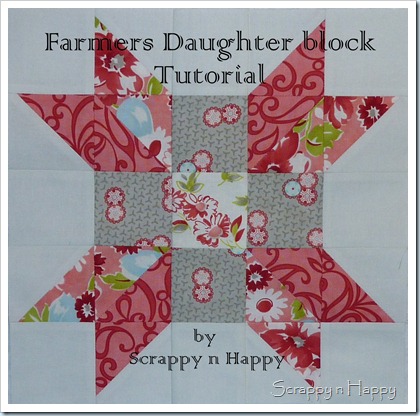
{QAL} Block 14 Farmer's Daughter

Jess has put up the tutorial for this week's block in our QAL - Farmer's Daughter.


Head on over to Scrappy n Happy for all the details!

I apologise too, I thought I'd posted the link for block 12 a couple of weeks ago, but I actually didn't...
It's a fab block called Tassel Flower. 


Only a few more blocks to go! Have fun!

xx Jess

Friday, 19 October 2012

{QAL} Block 13 - Crazy Ann

Welcome to this week's tutorial for the How Far Will You Go? QAL - a traditional block called Crazy Ann. Can I just add that I was more than slightly crazy by the time I put the tutorial together - those half-rectangle triangle units nearly did my head in ;o)


This tutorial is for a 10" finished block (10.5" unfinished). As always I have pressed my seam open unless otherwise noted, and all seam allowances are a scant 1/4 inch unless otherwise noted.

Cutting Instructions:

Print Fabrics:

You will need four different print fabrics to make this block.


Fabric 1 (centre square) - One 2.5" square
Fabric 2 - Two 4 7/8" squares
Fabric 3 - Four 2.5" squares
Fabric 4 - Two 3" x 5.5" rectangles.

Cut your Fabric 2 squares diagonally in half:


And cut your Fabric 4 rectangles diagonally through the centre - please make sure it is this angle, not the other way (I recut these pieces more times than I'd like to count!)


Background Fabrics:


You will need:

* Four 5.5" x 2.5" rectangles
* Four 2 7/8" x 2 7.8" squares.

Take your four 2 7/8" squares, and cut them diagonally through the centre.


 Piecing the Corner Units:

The four corner units in this block are identical - so we'll be making four of these units. 

First take your Fabric 3 squares, and sew one of your background triangles to the side as shown, taking care to line up the top edges. 

Press this seam open and trim off the little dog ear. Take a second background triangle and place it as shown. 


 Sew this seam and press it open. You should end up with four of these units:


Next take your Fabric 2 triangles and align them as shown:


Sew along this seam and press your seam open.


These corner units should measure 4.5" square.

Half Rectangle Units

These units caused a fair amount of stress. I tried numerous times to get these to work and failed - the only way I can see these could possibly work is by using foundation paper piecing. If anyone knows a better way I would LOVE to hear it! 

Now, I don't have templates for you to print so you'll have to draw them up yourself (I am soooo mean!) 

You will need to draw four rectangles, measuring 2" x 4" each. THIS DOES NOT INCLUDE SEAM ALLOWANCE!!! So you'll be trimming 1/4" away from the paper later on...


Draw a diagonal line (at the angle shown) through each of the rectangles, and cut them out.


I labelled mine, but that's totally up to you...


Take your Fabric 2 half-rectangle triangle and place it right side up on the back of your template. Take a background rectangle and place it as shown:


Sew along your drawn line, fold back the paper and trim 1/4" away from your seam. Press the background fabric over.
:


Using your paper as a guide, trim 1/4" away from the template.


And you should end up with four units like this, each measuring 2.5" x 4.5":


Putting the Block Together:

Arrange your block units as shown, and simply piece together like a 9 patch. 


And a completed Crazy Ann block!


There are two of these in the full Twin quilt - as always please add your blocks to the Flickr group :o) 


xx Jess