This is pretty much the half way week in the block tutorials! I'm amazed how quickly it's going - and how awesome everyone's blocks are looking. I will be doing a giveaway for everyone doing the QAL - probably through the Flickr page in the next week or so, I'll give you details once I've worked out what to give away - but it'll be yummy ;o)
On to the tutorial! This week we'll be making the first 20" block (so 20 1/2" unfinished). There is only one of these in the quilt - and it did take me a fairly long time to make. If you've made a swoon block, it's pretty similar. The traditional Dutch Rose is made with true diamonds - and involves endless Y-seams. I've simplified it so we're not using true diamonds, and there is not a single Y seam :oD
All seams are a scant 1/4" unless otherwise noted and I've pressed my seams open throughout the block.
Cutting:
I've broken down the cutting instructions a bit - there are a lot of pieces to this block.
Background Fabric:
You will need to cut:
* Thirty two 3" squares
* Eight 3" x 5.5" rectangles
* Four 4" squares.
This next diagram shows how we'll be splitting the block up to make it. The letters (A, B, C) refer to the units we'll be making (four each of A and C, and one B) and the L1, D1 etc refer to the fabrics I've used.
The outer ring can be made using just two fabrics - and it's important to have a high contrast between these, either in value or in colour. I chose to make mine with two light and two dark fabrics - so I'll show you how to do that, but you can use as few or as many fabrics for the outer ring as you like!
Cutting the Outer Ring Fabric:
From the light fabrics, you'll need to cut:
* Eight 3" x 5.5" rectangles (I cut four each from my two fabrics)
* Two 4" squares (one each of two fabrics)
* Four 3" squares (two each of two fabrics)
From the Dark fabric, you'll need to cut:
* Eight 3" x 5.5" rectangles (I cut four each from my two fabrics)
* Two 4" squares (one each of two fabrics)
* Four 3" squares (two each of two fabrics)
Yes, these are identical, it just sounded so confusing when I tried to word it in one sentence ;o)
Cutting the Inner 8-Point Star Fabric:
I didn't plan my star fabrics especially well - more contrast between my fabrics would have been way more effective.
You will need to cut four 4" squares from each of two different fabrics (for a total of eight squares).

And that's all the cutting :o)
Making the A Units
I made two each of the above units because I was using two different light and two different dark fabrics. I've repeated them in the same order around the block - and I'll give instructions for how to do this. If you are only using one light and one dark, you'll make four identical Unit As.
** NOTE: I made mine using two 3" squares instead of a 3" x 5.5" rectangle of background fabric for the top left corner - you'll be using rectangles, which is way more sensible. Not sure where my brain was... **
For Unit A you'll need:
* Four 3" x 5.5" background rectangles.
* Sixteen 3" background squares.
Dark print/s:
* Four 3" x 5.5" rec
* Two 4" squares
* Four 3" squares
Light print/s:
* Four 3" x 5.5" rec
* Two 4" squares
* Four 3" squares
First of all, take your 4" squares of light and dark fabric (two of each) and pair them up as shown.
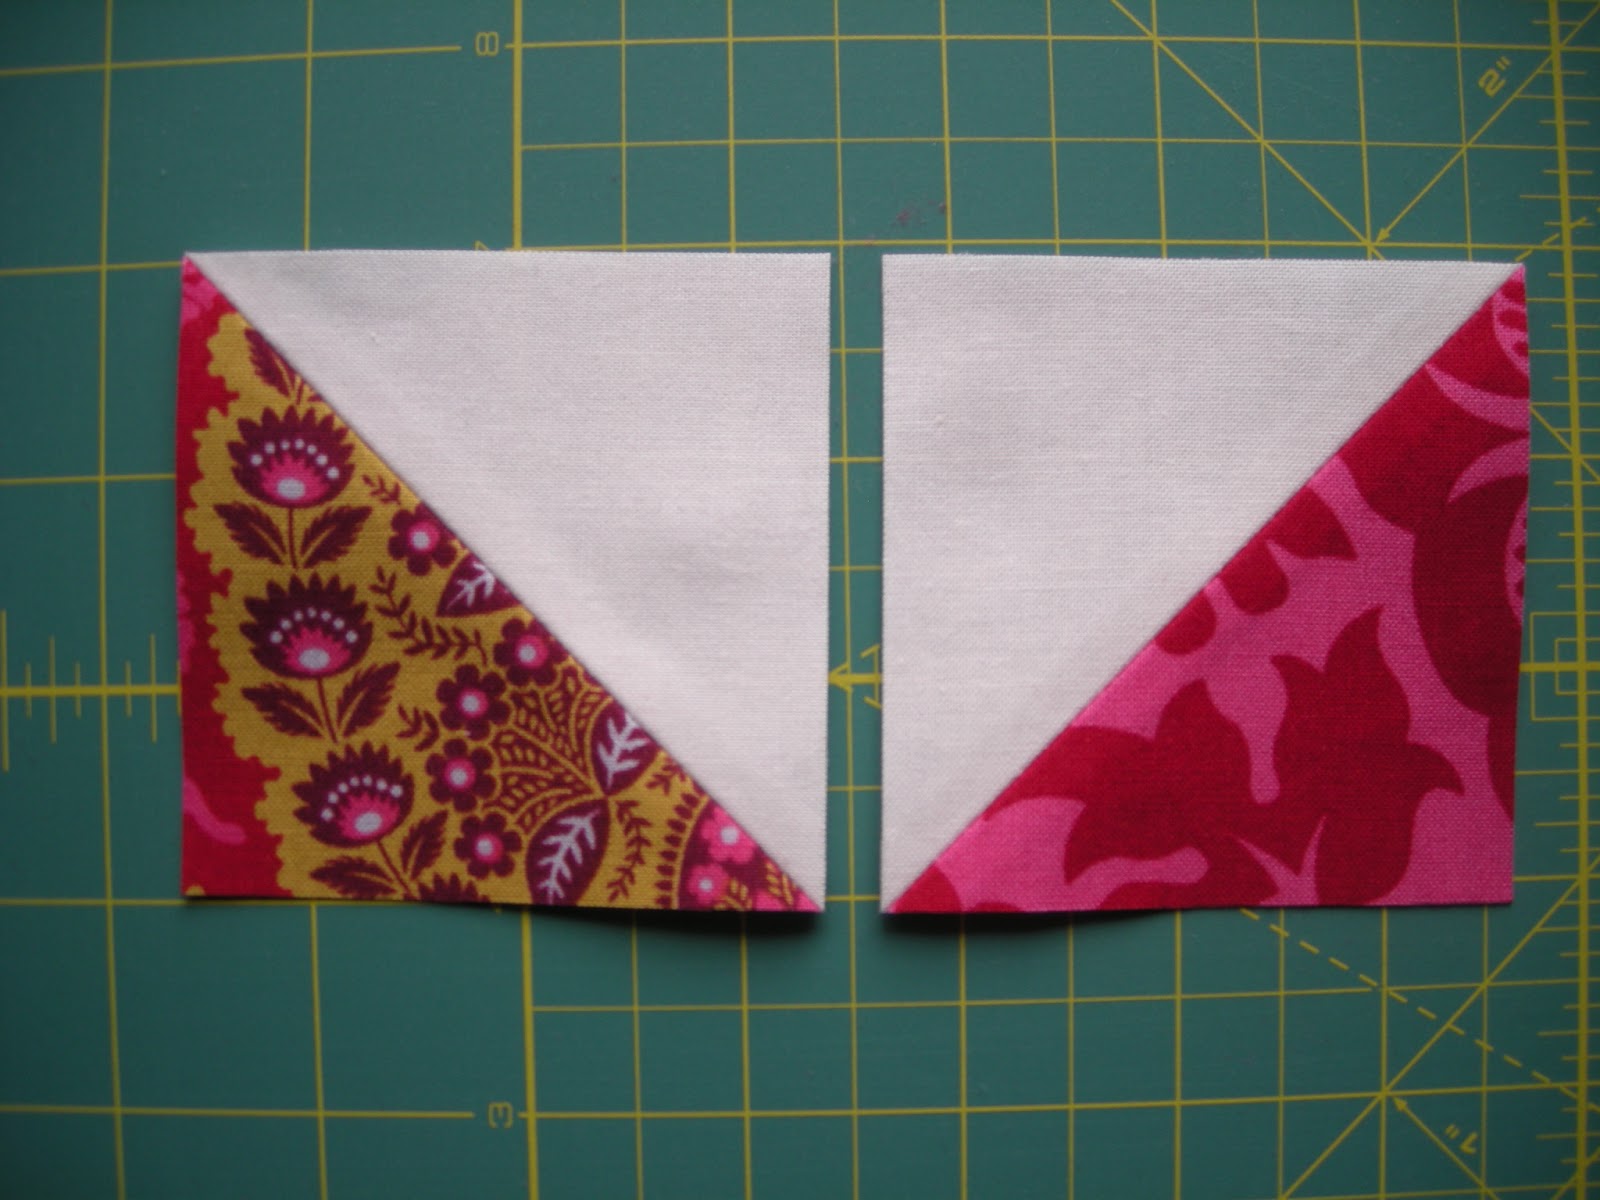
We'll be making half-square triangles from these. Take the light print from each pair and draw a diagonal line through the centre.

Pair each of them with their dark partner and sew 1/4" either side of the line.
Cut along this line, press your HSTs and trim them down to 3" square. You will have four dark/light HSTs.
This next bit is just to make sure you get the correct placement of fabrics for the rest of the Unit A blocks. If you're only using two prints it is much easier - you'll have four identical Unit A blocks, with your light and dark fabrics alternating within the unit.
Place your HST with the dark fabric toward the bottom as shown in the centre of these photos.
Place a 3" x 5.5" light rectangle at the bottom of the block, and a 3" x 5.5" dark rectangle at the top right. Then place a 3" dark square and 3" light square on top of these as shown in the photo. Place a 3" square of background fabric at the bottom right and one midway up the left side, and a background 3" x 5.5" rectangle at the top left.
If you are using four different fabrics, you'll end up with two different layouts:
The reason for doing this laying out business, is that it makes the next step a lot less fraught with danger of stuffing up angles. Flip each of your 3" print squares over and draw a line diagonally through the centre. Place them back on their rectangle partner, making sure the line is at the correct angle to form diamond shapes as shown:
Sew along the drawn line for each of your rectangle/square pairs (you should have eight total). Trim 1/4" away from the line, and press.
I had two of each of these.
Next take eight background 3" squares and draw a line diagonally through the centre.
Place one of these on each of your print rectangles, making sure the line is at the same angle as the one you just sewed.
Sew along this line, trim 1/4" away and press again.
Arrange these rectangles back in the Unit A layouts. Now it's simply a matter of sewing the bits together.
Start by sewing the HST to the background 3" square next to it.
Then sew the 3" x 5.5" background rectangle on as shown:
Next sew your unit sections into rows
And finally, sew your rows together.
These Unit A pieces should measure 8" square.
Making Unit B
Take your eight 4" squares of the 8 point star fabrics and four 4" background squares.
We'll be making HSTs out of all of these squares.
Pair up TWO of EACH of the print fabrics with the four background squares. Draw a line diagonally through the centre of the background squares.
Pair up the remaining print pairs, so each pair has one of each print. Draw a line diagonally through the centre of the light fabrics.
Sew 1/4" away from either side of the drawn line on each pair (six pairs total), cut along the line and press your seams. Trim these down to 3" square. You should have twelve HSTs total.
Arrange your HSTs as shown, to create an eight pointed star:
Take each of the pairs of star points, and sew them together.
Press your seam - we'll be using these soon when we make the Unit Cs. It's useful to place them around the central pinwheel so you can be sure the fabrics are in the right place when the block goes together.
Take the centre pinwheel HSTs and sew these into a four patch. This should measure 5.5" square, and it is Unit B in the block. Set this aside until later.
Making Unit C
We'll be making four of the above Unit C sections.
You will need the remaining eight 3" x 5.5" print rectangles (four light, four dark), and sixteen 3" background squares. Draw a line diagonally through the centre of all sixteen background squares.
Lay out your Unit A blocks with a space between them, and place a light and dark rectangle vertically between them as shown. This is especially useful if you're using two each of light and dark - you can see how the order will emerge, and make sure you pair up the correct fabrics. You'll have two pairs like this one, and two using your other light/dark pairs.
If you're only using one light and one dark, you'll have four pairs the same - light on the left, dark on the right.
Place a 3" background square at the top of each of your rectangles, with the lines angled as below (so they meet in a point at the top). Sew along this line on each of your eight rectangles, trim 1/4" away and press.
Sew along this line on each of your eight rectangles, trim 1/4" away and press.
Take the remaining eight 3" background squares and place them at the other end of the print rectangle, with the line at the same angle as the seam you just sewed.
Again, sew along this line, trim 1/4" away and press. You'll end up with four pairs of light/dark diamonds.
Sew each pair together, ensuring you pair up the correct fabrics if you're using the four fabric option. Press your seam.
Finally, take the star points you sewed into pairs in Unit B, and sew one to the bottom of each of your Unit C pairs. Press. This unit should measure 5.5" x 8".
Putting the Block Together:
Lay out your block as shown below:
Sew each of the units into rows, and then sew the rows together! You should end up with a 20 1/2" block.
Please let me know if you have any questions with this tutorial. I'm not sure how clear my instructions are - if you are confused, just ask! It does take a fair while to make - maybe 4 hours or more?
Have fun, and I hope everyone has a great weekend.
xx Jess