Friday, 10 August 2012

Blogiversary Giveaway from Sew Me A Song!!

I kind of can't believe it, but today is my first BLOGIVERSARY!! Even more exciting is that my lovely friend Becca who happens to run the extremely fabulous etsy shop Sew Me A Song (best name ever, or what?) is offering a fabulous giveaway to my lovely readers! Yay!!

Becca was co-owner of Sew Fresh Fabrics, but then all sorts of life changes (all good) led to her opening up Sew Me A Song in April this year. Sew Me A Song has a focus on Japanese fabrics and other fun, quirky prints. She has some seriously funky fabric.

Fabulous texty bundles:
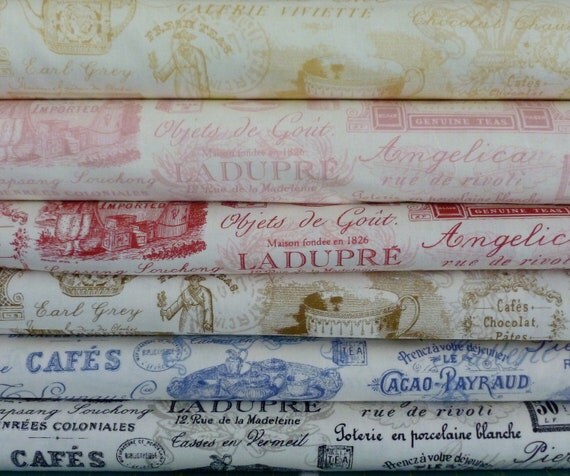

Image from Sew Me A Song
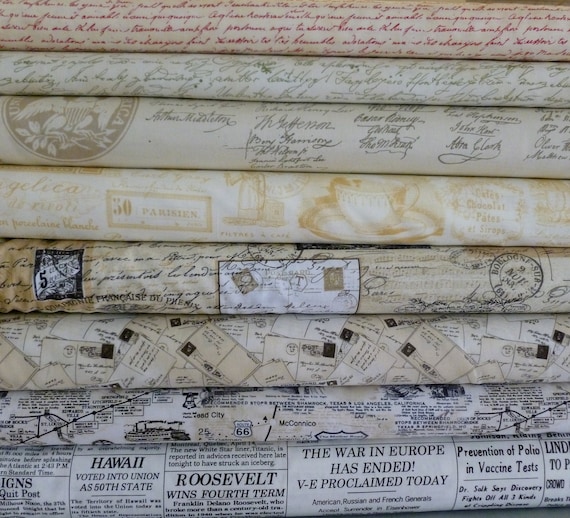

Image from Sew Me A Song

A great collection of Japanese fabrics ( I looove this one!)
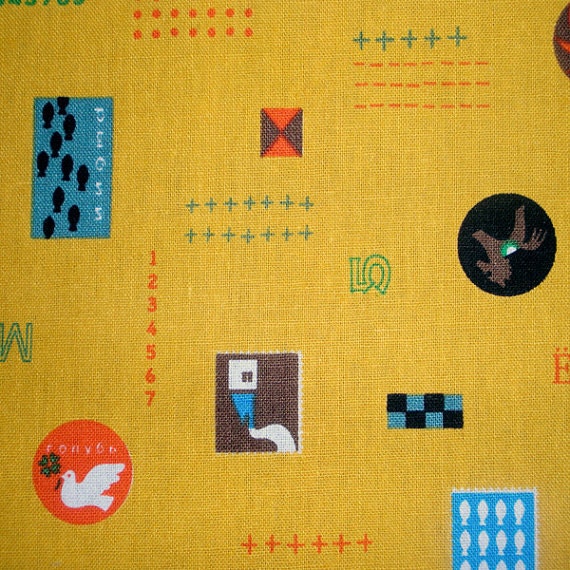
Image from Sew Me A Song

And a whole bunch of other awesomeness. 

And now for today's giveaway! Take a look at this fabulous texty bundle of goodness :o)


Image courtesy of Sew Me A Song

You could win a fat quarter of each of these eight texty fabrics (that's two yards, people!) From left to right:

Handwriting in Red from Penelope- Lake House Dry Goods
Script in Cream and sage from Timeless Treasures
Celebration by RK Tea Labels from Penelope by Lake House Dry Goods
Script and Postage from Paris 2012 by Timeless Treasures
Postcards in Cream from Wilmington Fabrics
Route 66 from Timeless Treasures
Headliner News from Blank Textiles.

Rules of Entry:
This giveaway is open to everyone. Giveaway will be open until 10pm Australian EST Friday 17th August 2012. PLEASE make sure if you're a no-reply commenter to leave an email address or another winner will be drawn. 

There are THREE chances to win:

1. Pop over to Becca's shop and leave me a comment letting me know your favorite fabric in her shop.
2. For a second entry, Follow Sew Me A Song on Twitter  and leave a comment saying you've done so.
3. My followers get a third entry - just leave me a comment saying you're a follower :o)

Good luck! 

xx Jess

Sunday, 5 August 2012

Binding Fail

So I finished quilting Finn's quilt on Thursday (and I really need to name it soon. Ideas?). And I made the binding and sewed it to the front. And then I sewed half of it over to the back. And I hate it.

Horrible iPad photo - but you can see a peek of our new red leather sofa :o)

This is the fabric that Finn chose - but he agrees that it looks awful. So now I have a loooong date with my seam ripper, and a piece of solid black that will hopefully be enough to become binding.

Quite annoyed about having to do it, but it's going to look so much better. My gut was to go with black - maybe next time I'll actually listen to myself...

xx Jess

Friday, 3 August 2012

{QAL} Weathervane Block

Jess has written up a brilliant tutorial for the second block in our QAL, the Weathervane block.


I love the combination of Ruby and FMF in this block! So if you're quilting along, head over to Jess's blog and check out the tutorial.

As always, don't forget to add your block to the Flickr group - there are some absolutely awesome blocks in there.

xx Jess

Wednesday, 1 August 2012

WIP Wednedsay

The little sewing time I've had this week has been spent quilting Finn's quilt. It's probably 90% done and I am so happy with how its coming along. I'll be honest - I hate the process of straight line quilting, but the results are soooo good, it kind of makes it tolerable. 


I've quilted the coloured parts with straight lines 1" apart, following the zig zag pattern in the quilt top, which has given it the most amazing texture. I've used 50wt Aurifil in off white and its worked beautifully (the stitches kind of dissove into the quilt top). I'm really happy I decided to echo quilt - it is totally perfect for this quilt. 

Please ignore the massive amount of batting fluff on the back - and this is after a go over with the lint roller!

I decided to get a little bit fancy in the black sections - they're quite large areas, and I wanted to give them a little more visual interest, so I've quilted 1" apart, then 1/4", then 1" etc. using 50wt black Aurifil. I am totally over the moon with the black sections - it looks amazing! And Finn is thrilled with how it's coming together, so it's a win all around!

Hopefully this will be a finish by the end of this week :o)

Linking up to WIP Wednesday at Freshly Pieced (button in sidebar) - I'm looking forward to checking out what everyone has been up to this week :o)

xx Jess 

Tuesday, 31 July 2012

Fat Quarterly Designer Challenge

A few months ago I was sent a little bundle of fabric from the Fat Quarterly team for one of their designer challenges. The fabric was this little pile of Sugar Hill by Tanya Whelan (which is waaaay out of my comfort zone!)


I really struggled with what to make with these - but it was coming up to Mother's Day here, so I decided to make a cushion (pillow) for my mum. 


It's a part of the latest issue of Fat Quarterly (Issue 10) which is available now, and has some extremely cool projects in it :o) I didn't mean mine there, I actually don't love it very much. But my mum likes it and uses it, so it's all good.

I'm hoping to have a quilty finish later this week - I've nearly finished quilting Finn's quilt, and we've chosen the binding fabric together so it's all good to go if I get time. I'm single parenting for two weeks again (not yay at all) so there's not a lot of spare time or energy for sewing. 

Oh and thanks to all of you who have been putting up your QAL blocks in the Flickr group - I get all jumpy and excited that people are actually joining in! I really need to get out more ;o)

xx Jess


Friday, 27 July 2012

{QAL} Susannah Block Tutorial

Welcome to the first block tutorial as part of our How Far Will You Go? QAL!


The first block we will be making is called Susannah. This tutorial will make a 10 1/2" block unfinished (so it will be 10" finished).

This is a fairly straightforward block. It is effectively a four patch block, each 'patch' consisting of a two-patch unit and a half-flying geese unit.

All seams are sewn with a scant 1/4" seam. If you're not sure about the accuracy of your seams, please refer to this post for some tips and tricks on getting an accurate seam allowance.

Cutting:


You will need to cut the following from your fabrics:
  • Eight 3" squares of background fabric
  • Four 3" x 5.5" rectangles of Fabric 1 (the orange blockprint blossom here)
  • Four 3" squares of Fabric 2 (the aqua circular design here)

Making the Half-Geese Units:


I made up the name for these so I'm not sure if that's what they're actually called... but they are effectively a one-sided flying geese units. 

Start by taking four of your background fabric 3" squares and drawing a line diagonally through each of them.


Then, place one of your background squares on top of one of your Fabric 1 rectangles, carefully lining up three of the edges.


Sew along the drawn line:


Trim 1/4" away from your seam as below:


Press your seams as desired.


Repeat this process for the remaining three sets of rectangles and background squares.

Making the Two Patch Units:

Take your four squares of Fabric 2, and the remaining four background squares. Pair each of the background squares with a Fabric 2 square.


Sew each of your pairs together, and press. You should now have four 2-patch units like this:


Putting the Block Together:

You will need to pair each of your 2-patch units with a half-flying geese unit as per below. When you sew these together, make sure the background triangle is on the opposite side to the background square (as shown in this photo). 


Sew these together, and press your seams.


You'll end up with four units as above. 

Arrange your four units as shown (yes there was some frogging involved here ;o):


Sew each half together in pairs:


And then sew the two halves together:


And ta-da! You have a finished Susannah block! If you are making the full twin sized quilt as is, you will need to make two of these blocks. My other version is this:


Hopefully this makes sense - if you have any questions at all leave a comment here or email me directly and I'll get back to you!


I would love to see your version of the block - please upload any finished blocks to the Flickr group :o)

x Jess

Thursday, 26 July 2012

Piecing Tips and Tricks

After participating in my first QAL last year, and discovering I was really really crap at getting accurate seam allowances, I did a bit of research into the best way to get an accurate 1/4" seam allowance. So since my own QAL starts tomorrow (whoop whoop! So excited!) I thought I'd share what I learnt and what works for me. As part of this, I would love to hear if you have any tips and tricks you'd like to share as well - I'm completely self-taught thanks so the generosity of so many bloggy peeps out there sharing their methods. But those of you who have actually taken classes etc probably have way more knowledge about this stuff, and I'm always looking to improve the way I do things :o) I've divided this post into two parts - pressing methods and seam accuracy.

The Pressing Issue

So how do you make sure you're actually getting a 1/4" seam? I'm not going to reinvent the wheel here, I'm just going to direct you to some really great tutorials written by way more talented peeps than me. One of the key points I'd like to make though is in regards to pressing - whether you press your seams open or to the side makes an enormous impact on the accuracy of your seams. When I started working through this process I was a hardcore pressing seams to the side convert. By the end I'd started pressing my seams open, and I've never looked back. 


I think this article is worth reading - this was pivotal in changing my thinking, and the reason I gave pressing open a go. But it's a personal choice, there is no right or wrong way to go. I would encourage you to play around with pressing open vs to the side and decide which works best for you :o) 


If you're interested in learning how to press your seams open, this post has some great step by step photos.  

1/4" Seams

So you've decided how you'd prefer to press your seams. How do you know that the seam itself is accurate? I would suggest this brilliant tutorial by Amy of Amy's Creative Side as the perfect starting point. This was my starting point. I worked through her tutorial several times, trying different pressing methods and changing my needle position until I arrived at my perfect 1/4" seam. Every sewing machine will be different, so what worked for me might not work for you. I found on my Bernina, that the edge of my patchwork foot gives a true 1/4" seam IF I press open. If I press to the side, its too big. If I move my needle to the right, it's too small.

I hope you find some of these links helpful and relevant. And if you have any other ideas I would love to hear them! I'll be back tomorrow with a block tutorial :o)

x Jess