Block 15 is called Pinwheel Skew - and it's a 5.5" (unfinished) block. We'll be tackling a technique we haven't done yet - partial seams.
The centre part of this block is paper pieced - head over and download the template. Remember to print with NO page scaling :o)
Cutting:
You will need background fabric and two different print fabrics for this block.
Print 1 (the centre pinwheel):
* Four 3" x 1.5" rectangles.
Print 2:
* Four 1.5" x 2.5" rectangles
Background Fabric:
* Four 1.5" x 2.5" rectangles.
* Two 4" x 4" squares - cut each of these diagonally through the centre.
Making the Central Pinwheel:
Print out your template - it won't have numbers on it so if you'd like to, write them on :o) You'll be making two identical halves for the pinwheel.Take one of your background triangles, and place it on the wrong side of the template.
Remember to reduce your stitch length (I reduce mine to 1.5mm), and I like to do a couple of backstitches at the start and end of each seam.
Then take one of your Print 1 rectangles, and place it as shown behind the template (right side toward the paper).
Sew along the line between 1 and 2, fold back the paper and trim 1/4" away. Press the print fabric over.
Take another background triangle, and place it as shown - it should sit square behind the template.
Again, sew along the line, fold the paper back and trim 1/4" away.
Press the background fabric over. Take another Print 1 rectangle, and place it as shown.
Again, sew along the line, fold the paper back, trim and press your fabric over.
Next, trim down the two halves of the pinwheel, using the paper as a guide.
Take the two halves, and sew down the centre seam - I leave my paper in and follow the line, but you could remove the paper first if you prefer.
Press your seam (I pressed open) and the pinwheel is complete! It should measure 3.5" square (mine is square, it just doesn't look it ;o) )
Making the Borders
Take all eight of the 1.5" x 2.5" rectangles (four background, four print), and sew them end-to-end into pairs like so:Press your seam open.
Line up one of your border sections, so the print part is aligned with a background section of the pinwheel, and a tail of background fabric hangs off the end.
Sew PART WAY along this seam, starting at the print end and stopping about 3/4" -1" before the end (I probably could have left myself more room here). Backstitch a few stitches to secure the end of the seam.
I pressed the print end of this piece open.
Next, take another border strip and place it as shown (mine was actually the right length - I have no idea why it looks so short in this photo!!)
Sew along the whole seam and press open. Continue around the edge with each of your border pieces.
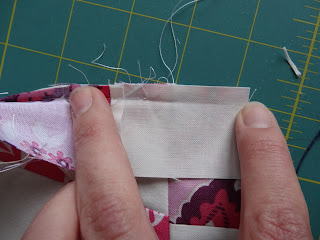
When you get to the final piece, sew along the whole seam, making sure to tuck the end of the first strip out of the way. Press the seam open.
Now you can finish sewing the end part of that first strip :o)
Press that final section of your seam, remove papers (if you haven't already) and you have a finished 5.5" Pinwheel Skew!
There are two of these blocks in the full twin quilt. As ever, please add your finished blocks to the flickr group :o)
xx Jess


4 comments:
I just love these blocks. I want to make them super bad.
These do look so cute and fun!
Beautiful block x
great block, as always!
Post a Comment